Freebox Fashion
In Madrid (no, not Spain, Madrid (pron. Mah-drid”), New Mexico) there is a yearly Free Box Fashion Show. I strongly recommend this for any small or large town looking for (free!) amusement. Of course first you need a Free Box, which through the year must be filled with lots of free clothes. A good place for one of these is a town hall or a church. You’ll need models, kids welcome, and an audience. A good time will be had by all.
In other recycled fashion news, the Good Will has a new and lauded boutique area at its San Francisco Fillmore Street store that features recycled materials fashioned into new fashion. Now that’s fashion forward.
Rules of the Game
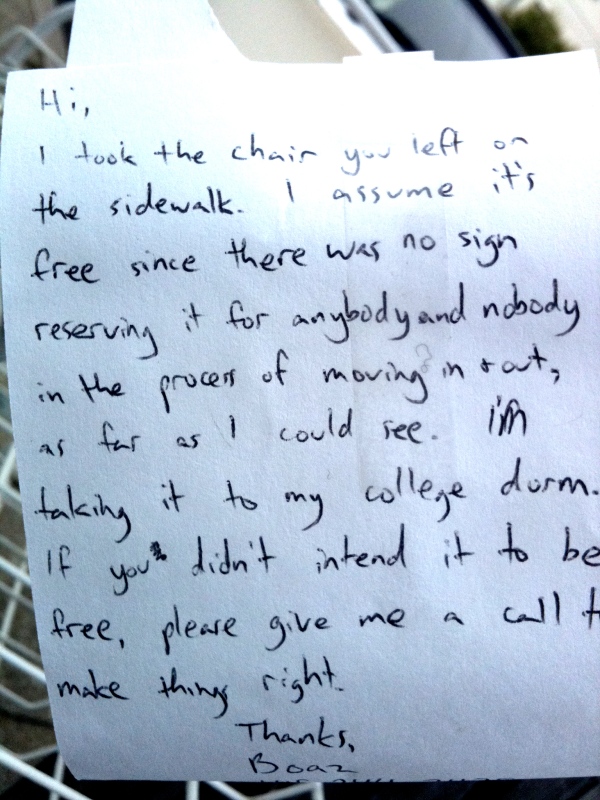
I found this great note on some junk we found on the sidewalk. Sadly it was junk, and not junque. We had to take a pass. But it brought up an interesting question: is it OK to take junk off the sidewalk?
Well, of course it is! People put it there so someone will take it. At least, in big cities, that’s what happens. Sometimes, there’s a big “free” sign on an item, but often if someone was too lazy to bring items to the Goodwill or the Salvation Army, they were too lazy to get out a piece of binder paper and write “free” in fat black Sharpie.
But… there are still some rules.
Don’t take a chair on a porch.
Don’t take a bench that’s chained to a tree. Or chained to anything.
Don’t take anything from a bag that is out for a donation truck to remove. (Donations often have a bright yellow or green card stapled to them or on top of them.)
Don’t take a mattress… for obvious reasons.
Don’t take anything if there’s a moving truck anywhere on the street.
Don’t take anything from a shopping cart that might belong to a homeless person.
And don’t feel ashamed; you are the cure for this world’s Affluenza problem!
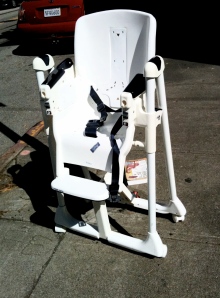
Just don’t go crazy, pick-up everything, and become a pack rat. Things like the below can just stay there until trash day.
Refinishing/Repainting Wood
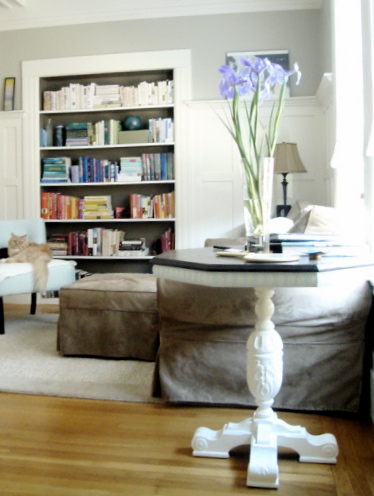
This table was painted a bright neon yellow when I found it. I painted it a lighter yellow, and that was fine for awhile. But then, with use, the top began to chip, and I decided it was asking to be stripped.
Stripping paint from wood is no easy task, but certain pieces will lend themselves to this process better than others. Notice that I didn’t try to strip the entire piece, just the flat top surface. I used a stripper (a big flat metal spatula-like thing) to chip off as much paint as I could. When I had a few bits of paint that wouldn’t budge, I used a citrus-based stripping liquid. This water-based stripper is less harsh than the one that have chemicals. You’ll still want to use goggles and gloves, however.
After the paint is stripped, sand and clean the surface. Then refinish your wood surface with the wood stain of your choice. I used dark mahogany. Apply the stain with a sponge or sponge brush so it does not pool. Letting it dry for at least 24 and preferably 48 hours, apply another coat of stain, or go straight to the lacquer. I’m a fan of finishing any stain with lacquer. It’s stinky, you should only use it outside, and it’s troublesome to clean up (have some paint thinner ready) but it looks terrific. Shiny, bright, and best of all, lacquering makes the surface easy to clean.
When I painted this table, I used eco-paint by Yolo Colorhouse (Air 01 and Water 04). I used a small paint brush (about a quarter inch) for the detail and a two-inch brush for the base. It took some time and effort, but this find has turned into one of my favorite pieces.
Chair Basics
 Even if you’re not into the DIY ethic that permeates today’s design blog world, everyone should know how to do a simple dining chair reupholster. Here is a chair I found across the street from our house. Things I look for in street finds? The bones. This chair has a neat scroll back, and solid construction.
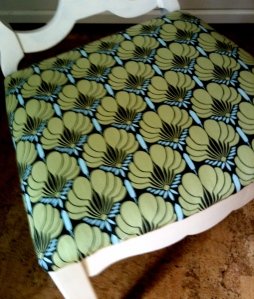
This chair has been through two incarnations. The first was to match our dining room chairs, which were mis-matched but similar. The fabric (attached with a very useful simplicity of a staple gun–more details below) was a silk stripe and now that the chair lives in our studio, and has been recovered with a fun Amy Butler print.
With any basic dining chair reupholster, you’ll need:
staple gun, 1/2 yard of fabric per chair, batting, flat head screwdriver, hammer or mallet, and safety goggles
You can either screw off or just pop off the seat. Using a flat-head screwdriver to carefully remove any staples or hammer to remove nails, take off the current fabric. It’s a good idea to throw away any batting that has been on a chair that is a found chair. Smells can linger in there.
So, get some new batting and lay it out flat over the wood seat base and over the sides. Carefully decide how you’d like the fabric pattern to show on the chair, and measure and cut each piece of fabric before beginning. Make sure to leave at least a two-inch border around your fabric cut so you have plenty of fabric to staple.
Place the fabric right side-down, and put the seat base with batting on top. Stretch the fabric over the wood seat (and the batting) and staple the center of each of four sides first. This is important. Side, side, top, bottom, works best.To get a really tight fit, it works best to have two sets of hands, or a foot holding the fabric really tightly in place. Check to make sure your fabric has not shifted. Keep going with the staples.
At the corners, fold the fabric in a a way that it does not bunch (like you’re wrapping a gift works well). Do the back corners first to practice (as they don’t show as much) then the fronts. Repeat with all the chairs. Your project should take about three hours from start to finish for four chairs. Good luck!
Paris Found
The first thing I ever found was a wrought iron candelabra. It was just sitting there, on the corner of Laguna and Chestnut streets in the Marina District of San Francisco. My husband gingerly walked around it, but I stopped, and despite the rust, despite the grungy edges, I could see this was a thing of beauty. A trouve: a find. And I turned it into a Paris Trouve.
Occasionally, people are horrified by the fact that I find, pick up, and take home discarded items. I usually find them on the ground… you know, someone else’s cast offs. But I love to find junk with good bones, and to give those found objects, a new, Parisienne life. If you love Paris, free stuff, funky art, and weekend DIY projects, welcome to the lost and found: Paris Trouve.


